

Introducing Pckd - The most powerful open-source URL shortener
Or at least, in theory | Story of how I built Pckd, the most tracking-intensive URL shortener


Overview
This month, I saw the Netlify-Hashnode hackathon 🤩 and immediately knew I found the excuse to spend my time bringing my prolonged idea to life.
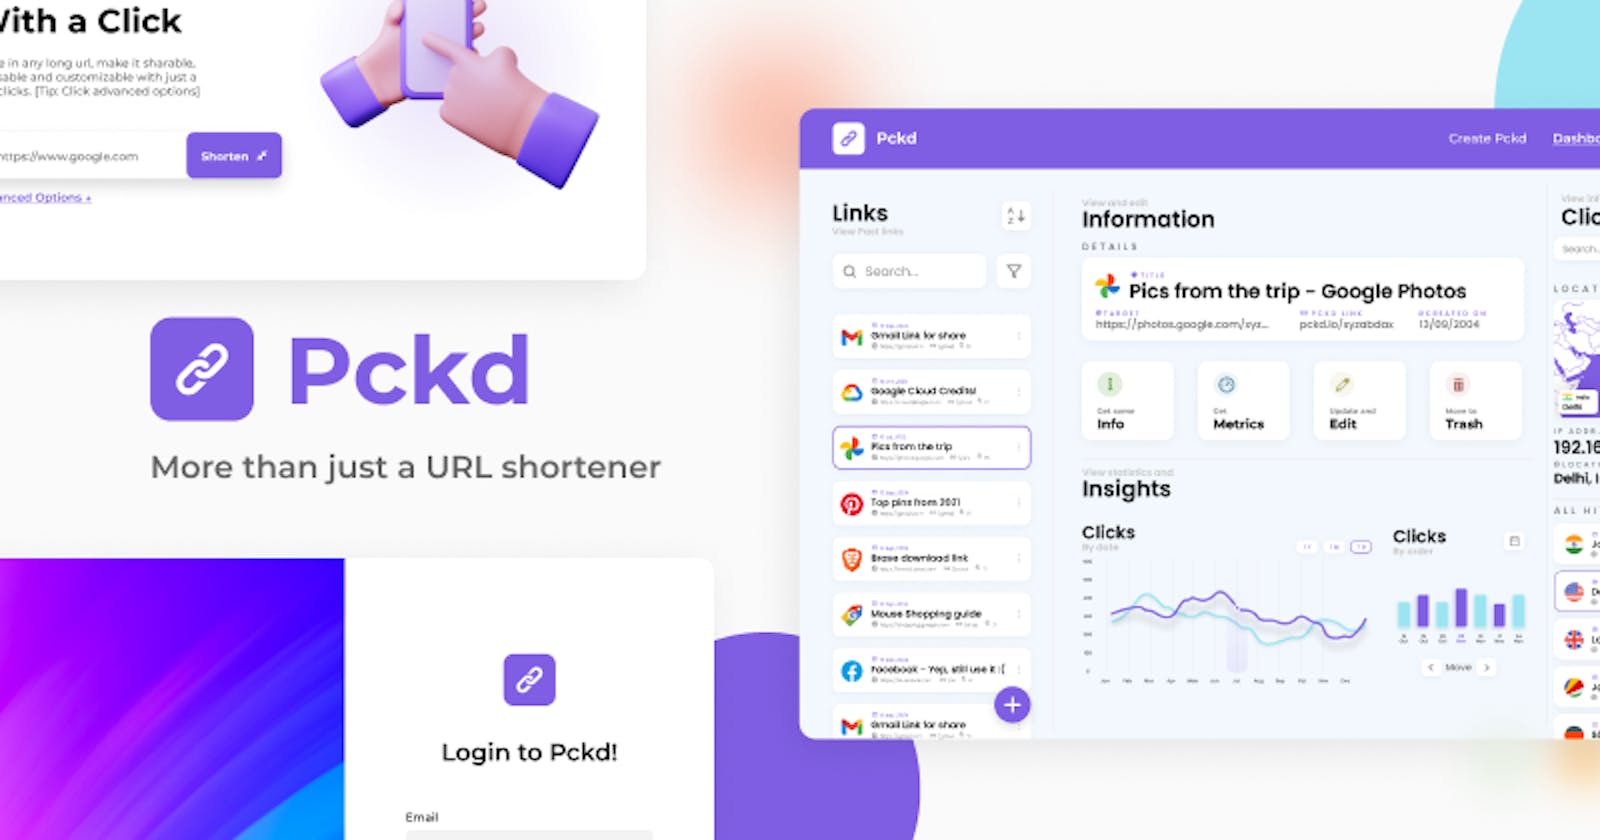
What exactly is 🔗 Pckd?
Have you ever wanted to share a link with a long link with a friend, but it seems way too long to send through a message (maybe it's a base-64 image URI), so you might turn towards URL shorteners, nothing special?
But try to imagine, along with the shortening functionality, what if you could have a lot more. I mean, track all the clicks (or hits) on the URL that you shortened and get very-deep insights about the person who clicked it, like:
- Their 💻 device information, including model, operating system, etc.
- Their 👩💻 browser name and version
- Their 🌎 IP location, along with their ISP name, their city, rough coordinates, etc.
And much more! 🤯
And to add the cherry on the top, you could host it yourself on your custom domain! In fact, it was created to be self-hosted, for people on the self-hosted community
Doesn't that sound like the time to switch from Bitly and stop paying the premium, and stop being limited by 100 links/month?
Tech Stack
Pckd uses the following technologies:
- Netlify ✨ for hosting the app
- React JS ⚛️ - For the frontend of the app
- Apollo GraphQL Server v3 🕸️ - For querying the backend from the frontend efficiently
- GraphQL Template By Mohit 🧩 - Boilerplate Template used for initializing the backend
- Prisma 💿 - The ORM used for the app
- MySQL for the database
- Redux 🗺️ w/ Redux Toolkit - For handling states across the application
- React Hook Form 🎣 - For managing and validating forms and text inputs.
- Styled Components 💅 - For adding CSS to the application
- IP registry API 🌐 - For obtaining 🏛 ISP, geolocation, etc. information for the IP address
Creation process 👩🎨
The creation process was undoubtedly the most fun part of the project. I solved many new challenges, learnt a lot, and finally came up with an application I was proud of! Here is how I pulled it off...
Designing 🎨
Usually when I create a pet project, I just use the designing from the previous projects I was working on, since they won't get noticed anyway. But with this one, I wanted it to reach to the top of the list of open source URL shorteners. I had self-doubts about whether I would be able to reach the goal with my experience, but you are free to judge.
Inspiration ✨
So, I started by looking for inspiration. The best place for this was dribbble. I went to the inspiration tab. Many people would create the best design they could without any inspiration, but as Pablo Picasso (may have) said:
Good artists create, great artists steal
That's one way to put it, but the point is: with the amount of design experience and the height of the goals I had, I just wasn't going to be able to create a good-enough design overnight if I started from scratch. Hence, the searching.
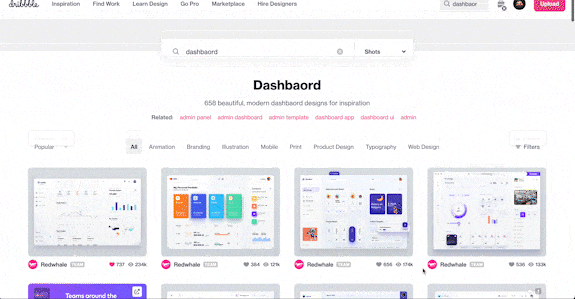
After endless scrolling, similar-sounding keywords and hard-to-make choices, I decided to go with this design, because it just looked great for the purpose I was looking for. There were many fancy ones too, but they just weren't practical, or too flashy for the typical programmer that was going to host it (if Pckd was even going to be successful).
Customizing 🍕
The original design was good, but it wanted something more, like the colour customization, planning out exactly where everything would go, and creating an exact mock-up of how the app would look. I find this approach very useful, because you don't have to scratch your head over minor details that would otherwise go unnoticed while planning, and you have to go to the sketch board all over again.
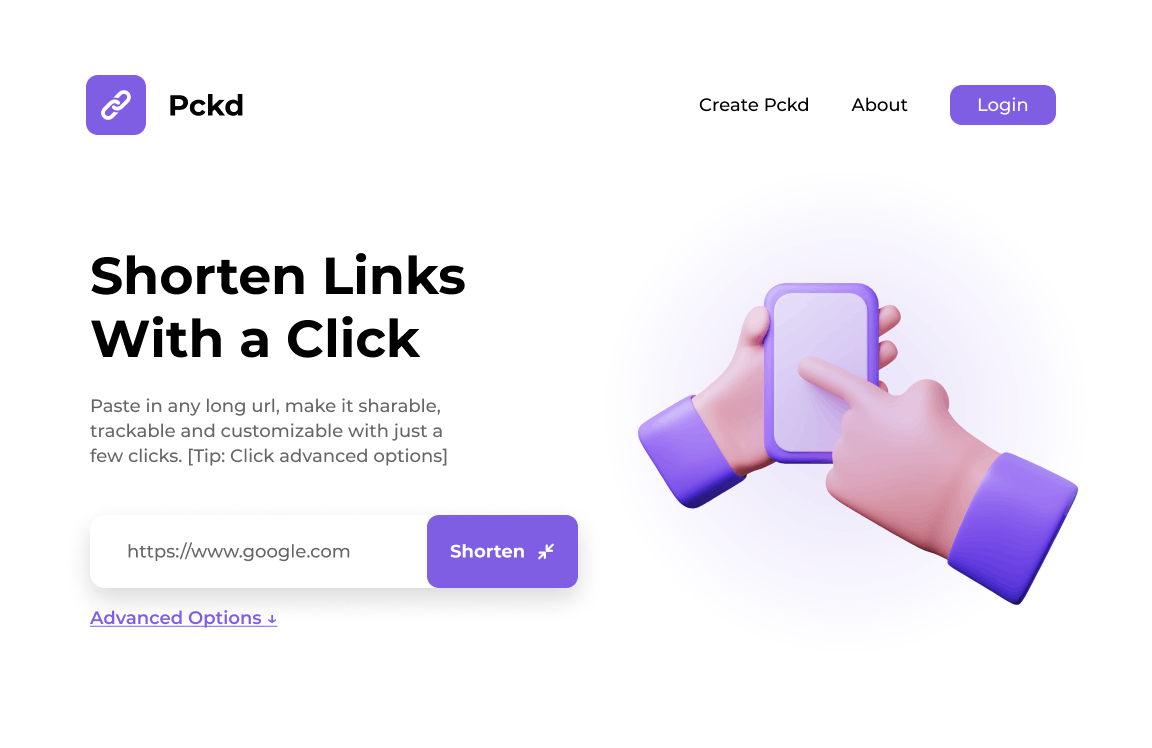
Dashboard 💾
I went on to Dribbble to find some designs. I got some that caught my attention. After that, I went to Figma and started laying out the design
Here's how the final result looked like:
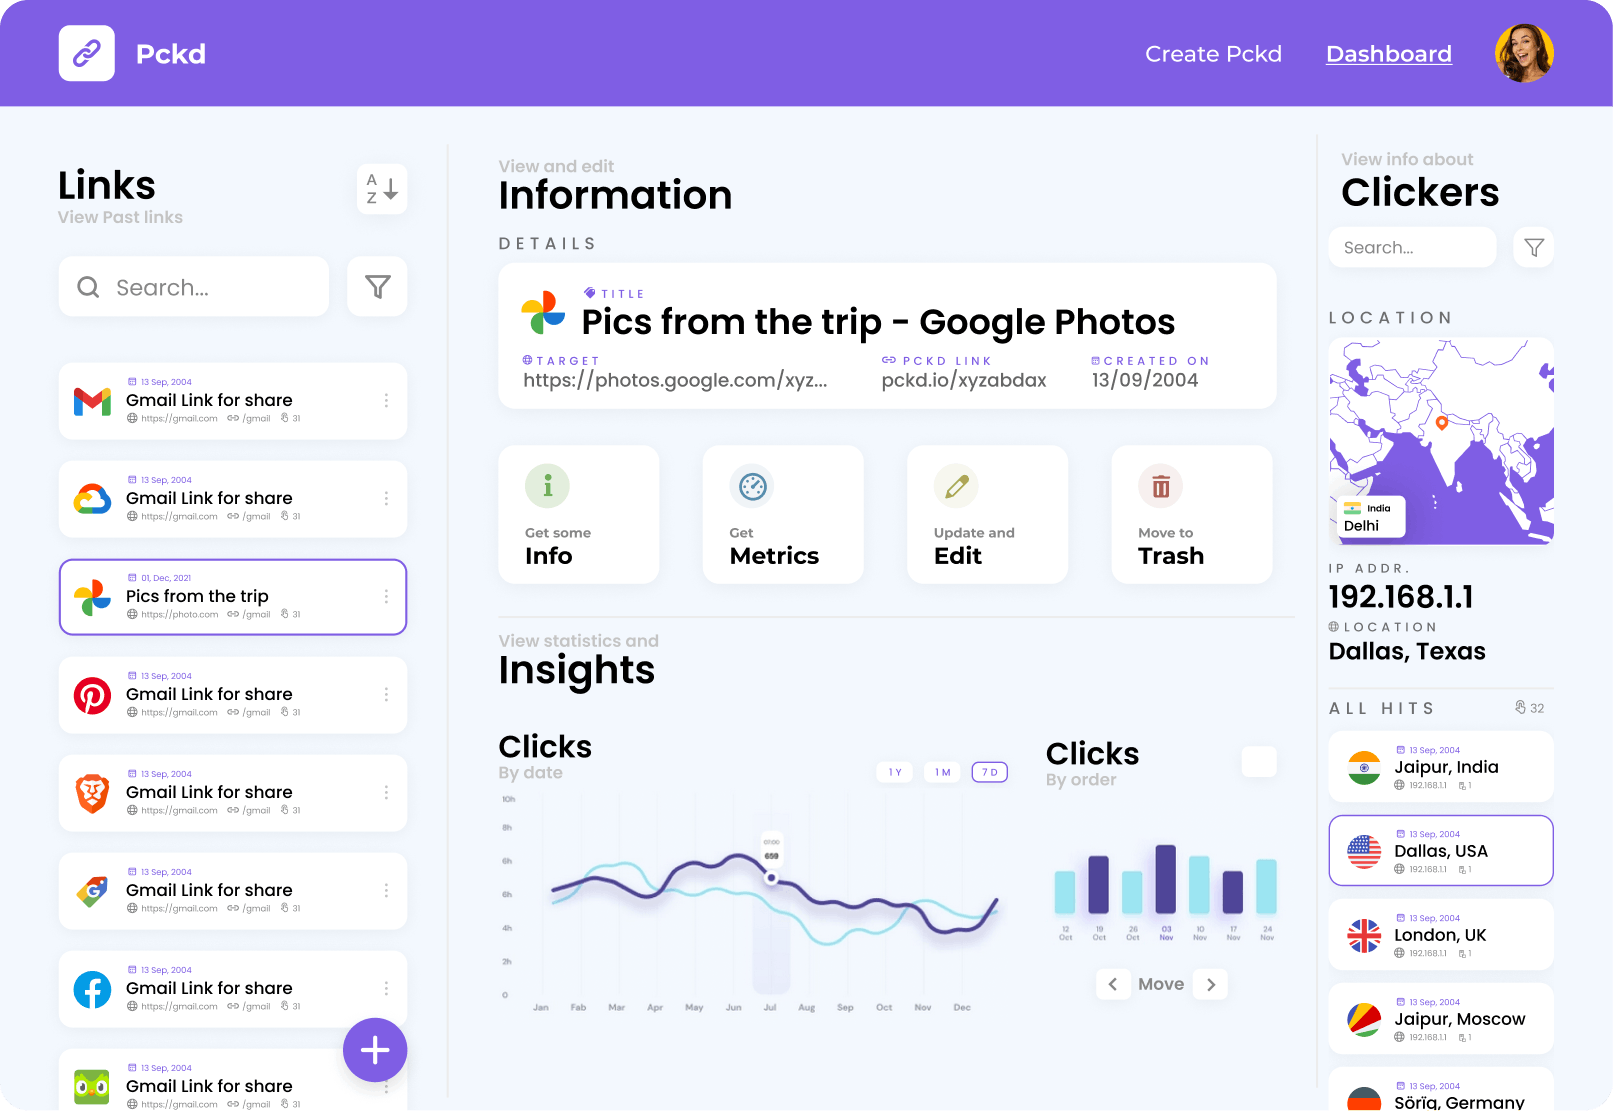
(I know they look totally different, or at least barely-related, but the inspiration image really helped with the design aspects, and most of the compliments I received are a result of that)
Other pages 🗞
As for the other pages, I created the homepage out of just my imagination. Here's how it looked:
And the signup pages:

The designs looked good in my opinion, and I was dead-set to implement the most design-accurate version of this with react and try to not mess up the margins or paddings somewhere. This marked the end of the designing and planning part of the app. Not bad, right?
Setting up the backend 🧩
For the backend, I started out by forking a backend template repo (made by me ;), because it contains a file-based structure, just like NextJS, but with backend. It also has authentication baked in, so we don't have to do the hassle of setting everything up.
The database schema 💾
OK, I want to have a hits table, a user table, and that's it. Oh! Forgot the pckd table, the main one! After all these conversations in my mind, I was ready with the following database schema
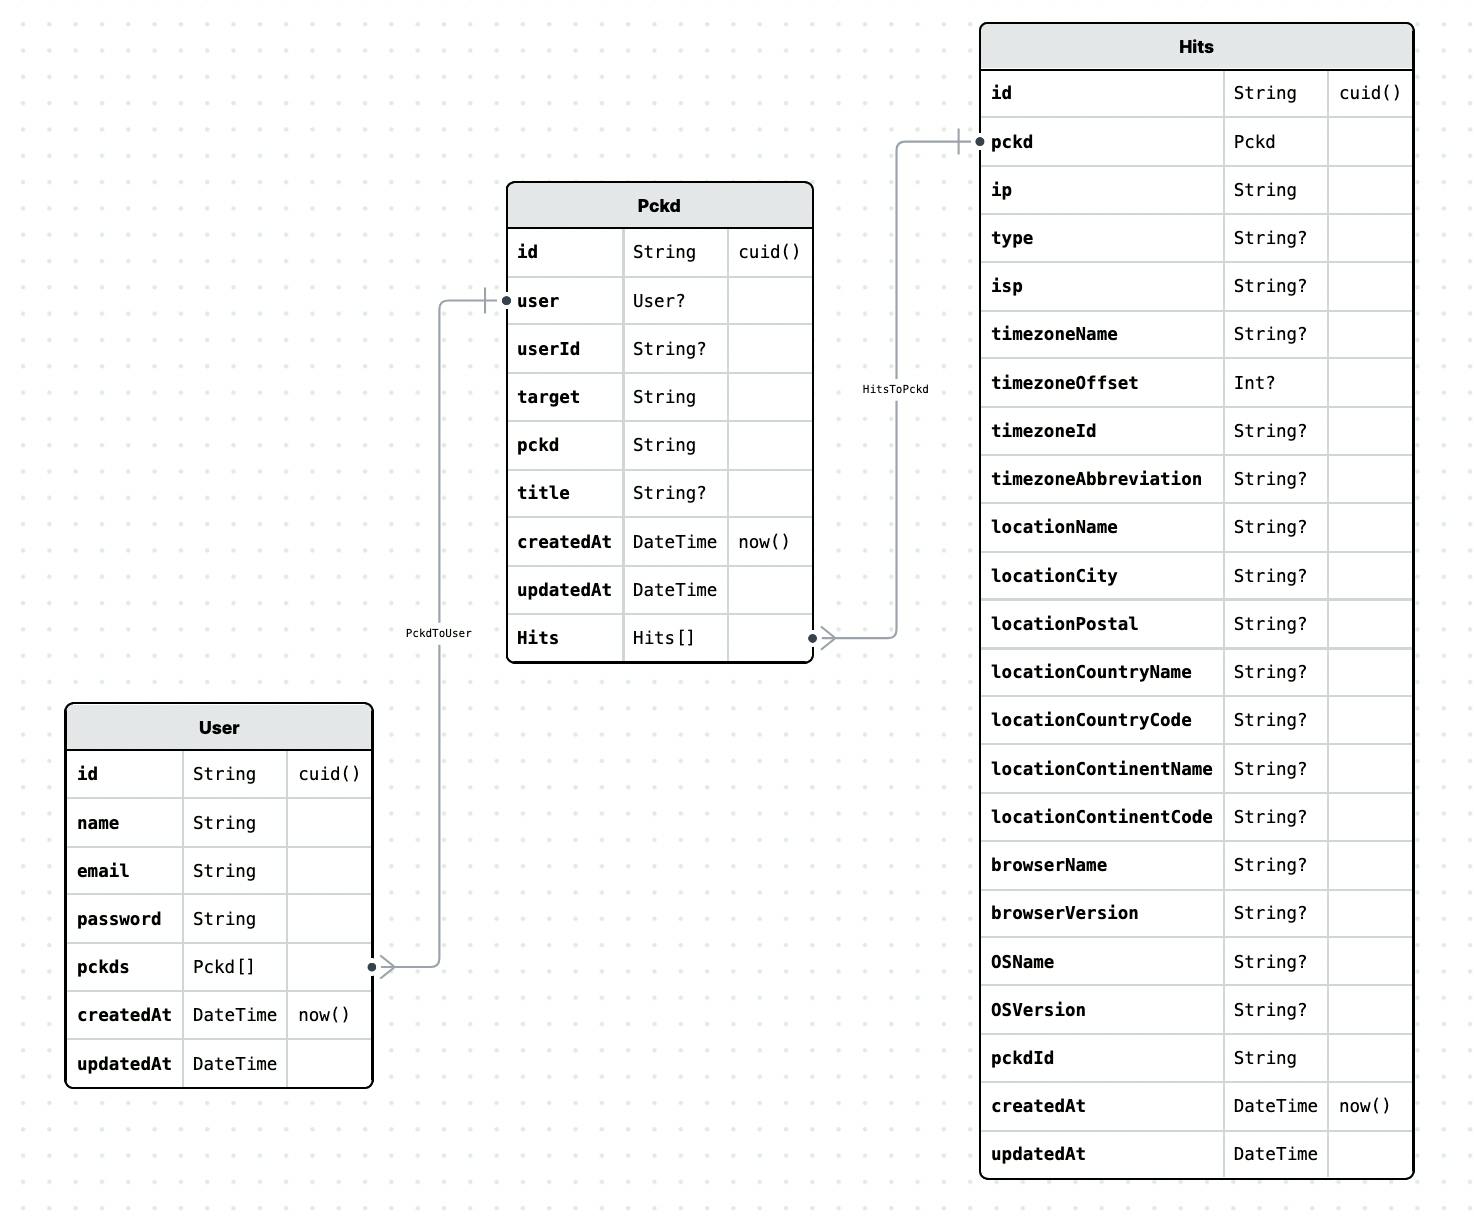
I created the database through the Prisma schema, and it ended up working great.
The file structure 📁
This is how the finished file structure looked like:
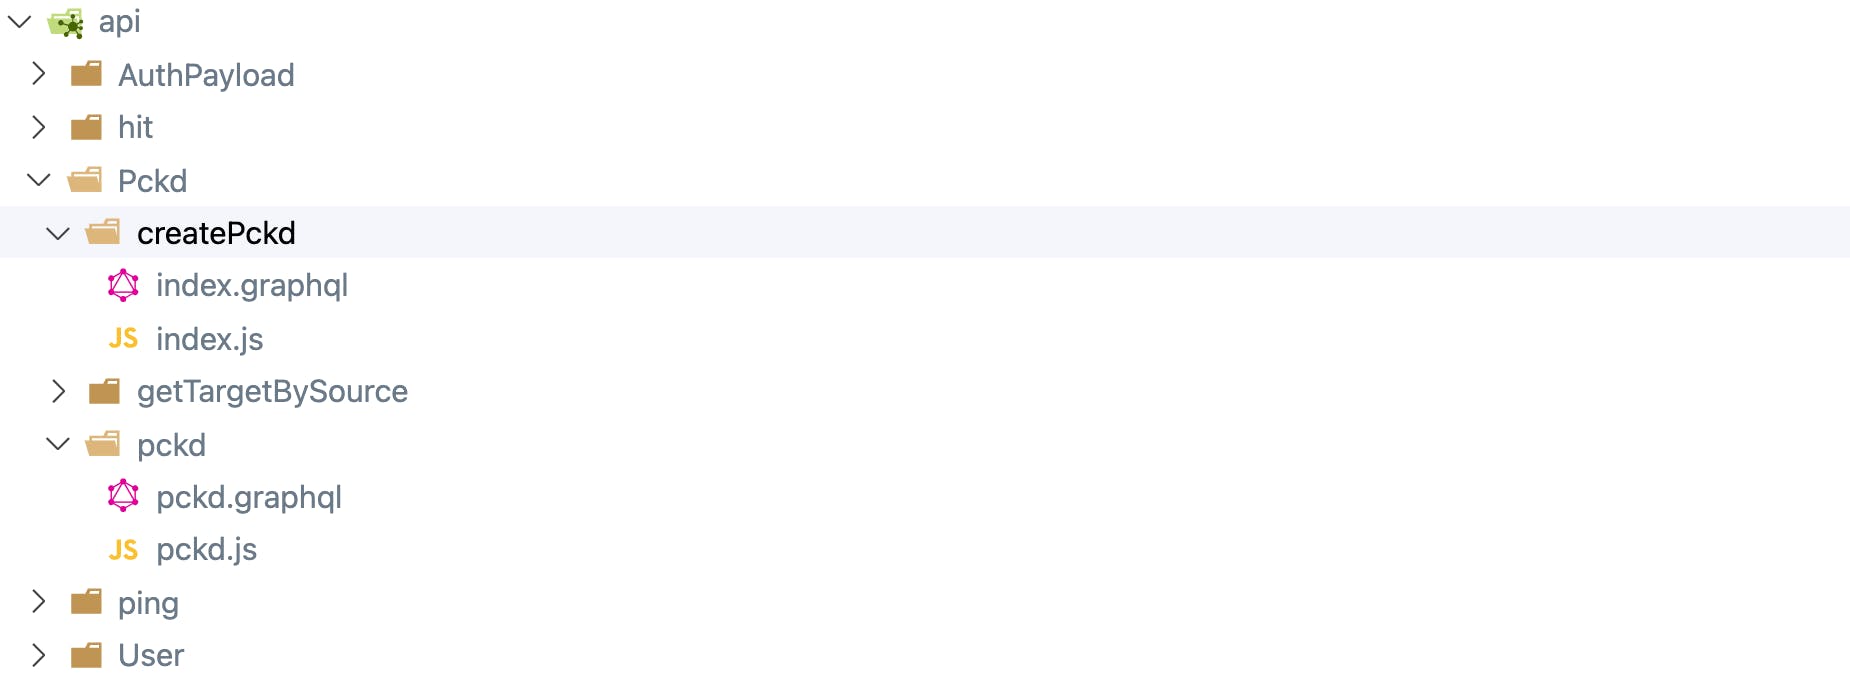
Adding a new route is just as easy as creating a new file in the directory, like for the user type, api/ping/user.graphql file needed to be created. This is how it looked like:
type User {
  id: ID!
  pckds: [pckd!]
  name: String!
  email: String!
  createdAt: String!
  updatedAt: String!
}
And For the resolving the users' pckd logic:
module.exports = {
  User: {
    pckds: async (parent, args, { prisma }) => {
      const pckds = await prisma.pckd.findMany({
        where: {
          userId: parent.id,
        },
      });
      return pckds;
    },
  },
};
As simple as creating an export file. You should definitely try this method of creating backends out. Little boilerplate, powerful APIs. 😃💪
Achieving this functionality ⛽
For combining the files to create a single instance of typeDef and resolvers, I used the following code
const path = require("path");
const { loadFilesSync } = require("@graphql-tools/load-files");
const { mergeTypeDefs, mergeResolvers } = require("@graphql-tools/merge");
const { makeExecutableSchema } = require("@graphql-tools/schema");

const typeDefs = loadFilesSync(path.join(__dirname, "/api/**/*.graphql"));
const resolvers = loadFilesSync(path.join(__dirname, "/api/**/*.js"));

const schemaWithResolvers = makeExecutableSchema({
  typeDefs: mergeTypeDefs(typeDefs),
  resolvers: mergeResolvers(resolvers),
});

module.exports = schemaWithResolvers;
This would combine all the files ending with the .js and .graphql extension from the api and it's sub-folder into a single typedef and resolvers variable.
Querying the backend 💬
For those who are new to GraphQL or haven't used apollo GraphQL before, Apollo provides a great interface for testing and creating queries, just like postman, but for Graphs, and much more powerful.
And creating APIs with GraphQL never gets easier

Setting up the frontend ⚛
For the frontend, I used React with the Create-react-app template, because it was easiest to work with, and I didn't use NextJS because the app didn't have much about SEO.
Along with react, I used Redux, and Apollo-graphql-client to query the backend, because the global state was shared across multiple components. Also, I wanted to learn Redux, and what other way to learn than to implement it yourself. (But it turned out to be an overkill 😅).
The typical React development pattern continues... At the end, we have a polished URL-shortener application that's fully customizable and ready to be deployed.
Hosting the app
For hosting the web app, I used netlify, as per the instructions. I created a netlify app from the dashbaoard, and the app was deployed in one click!
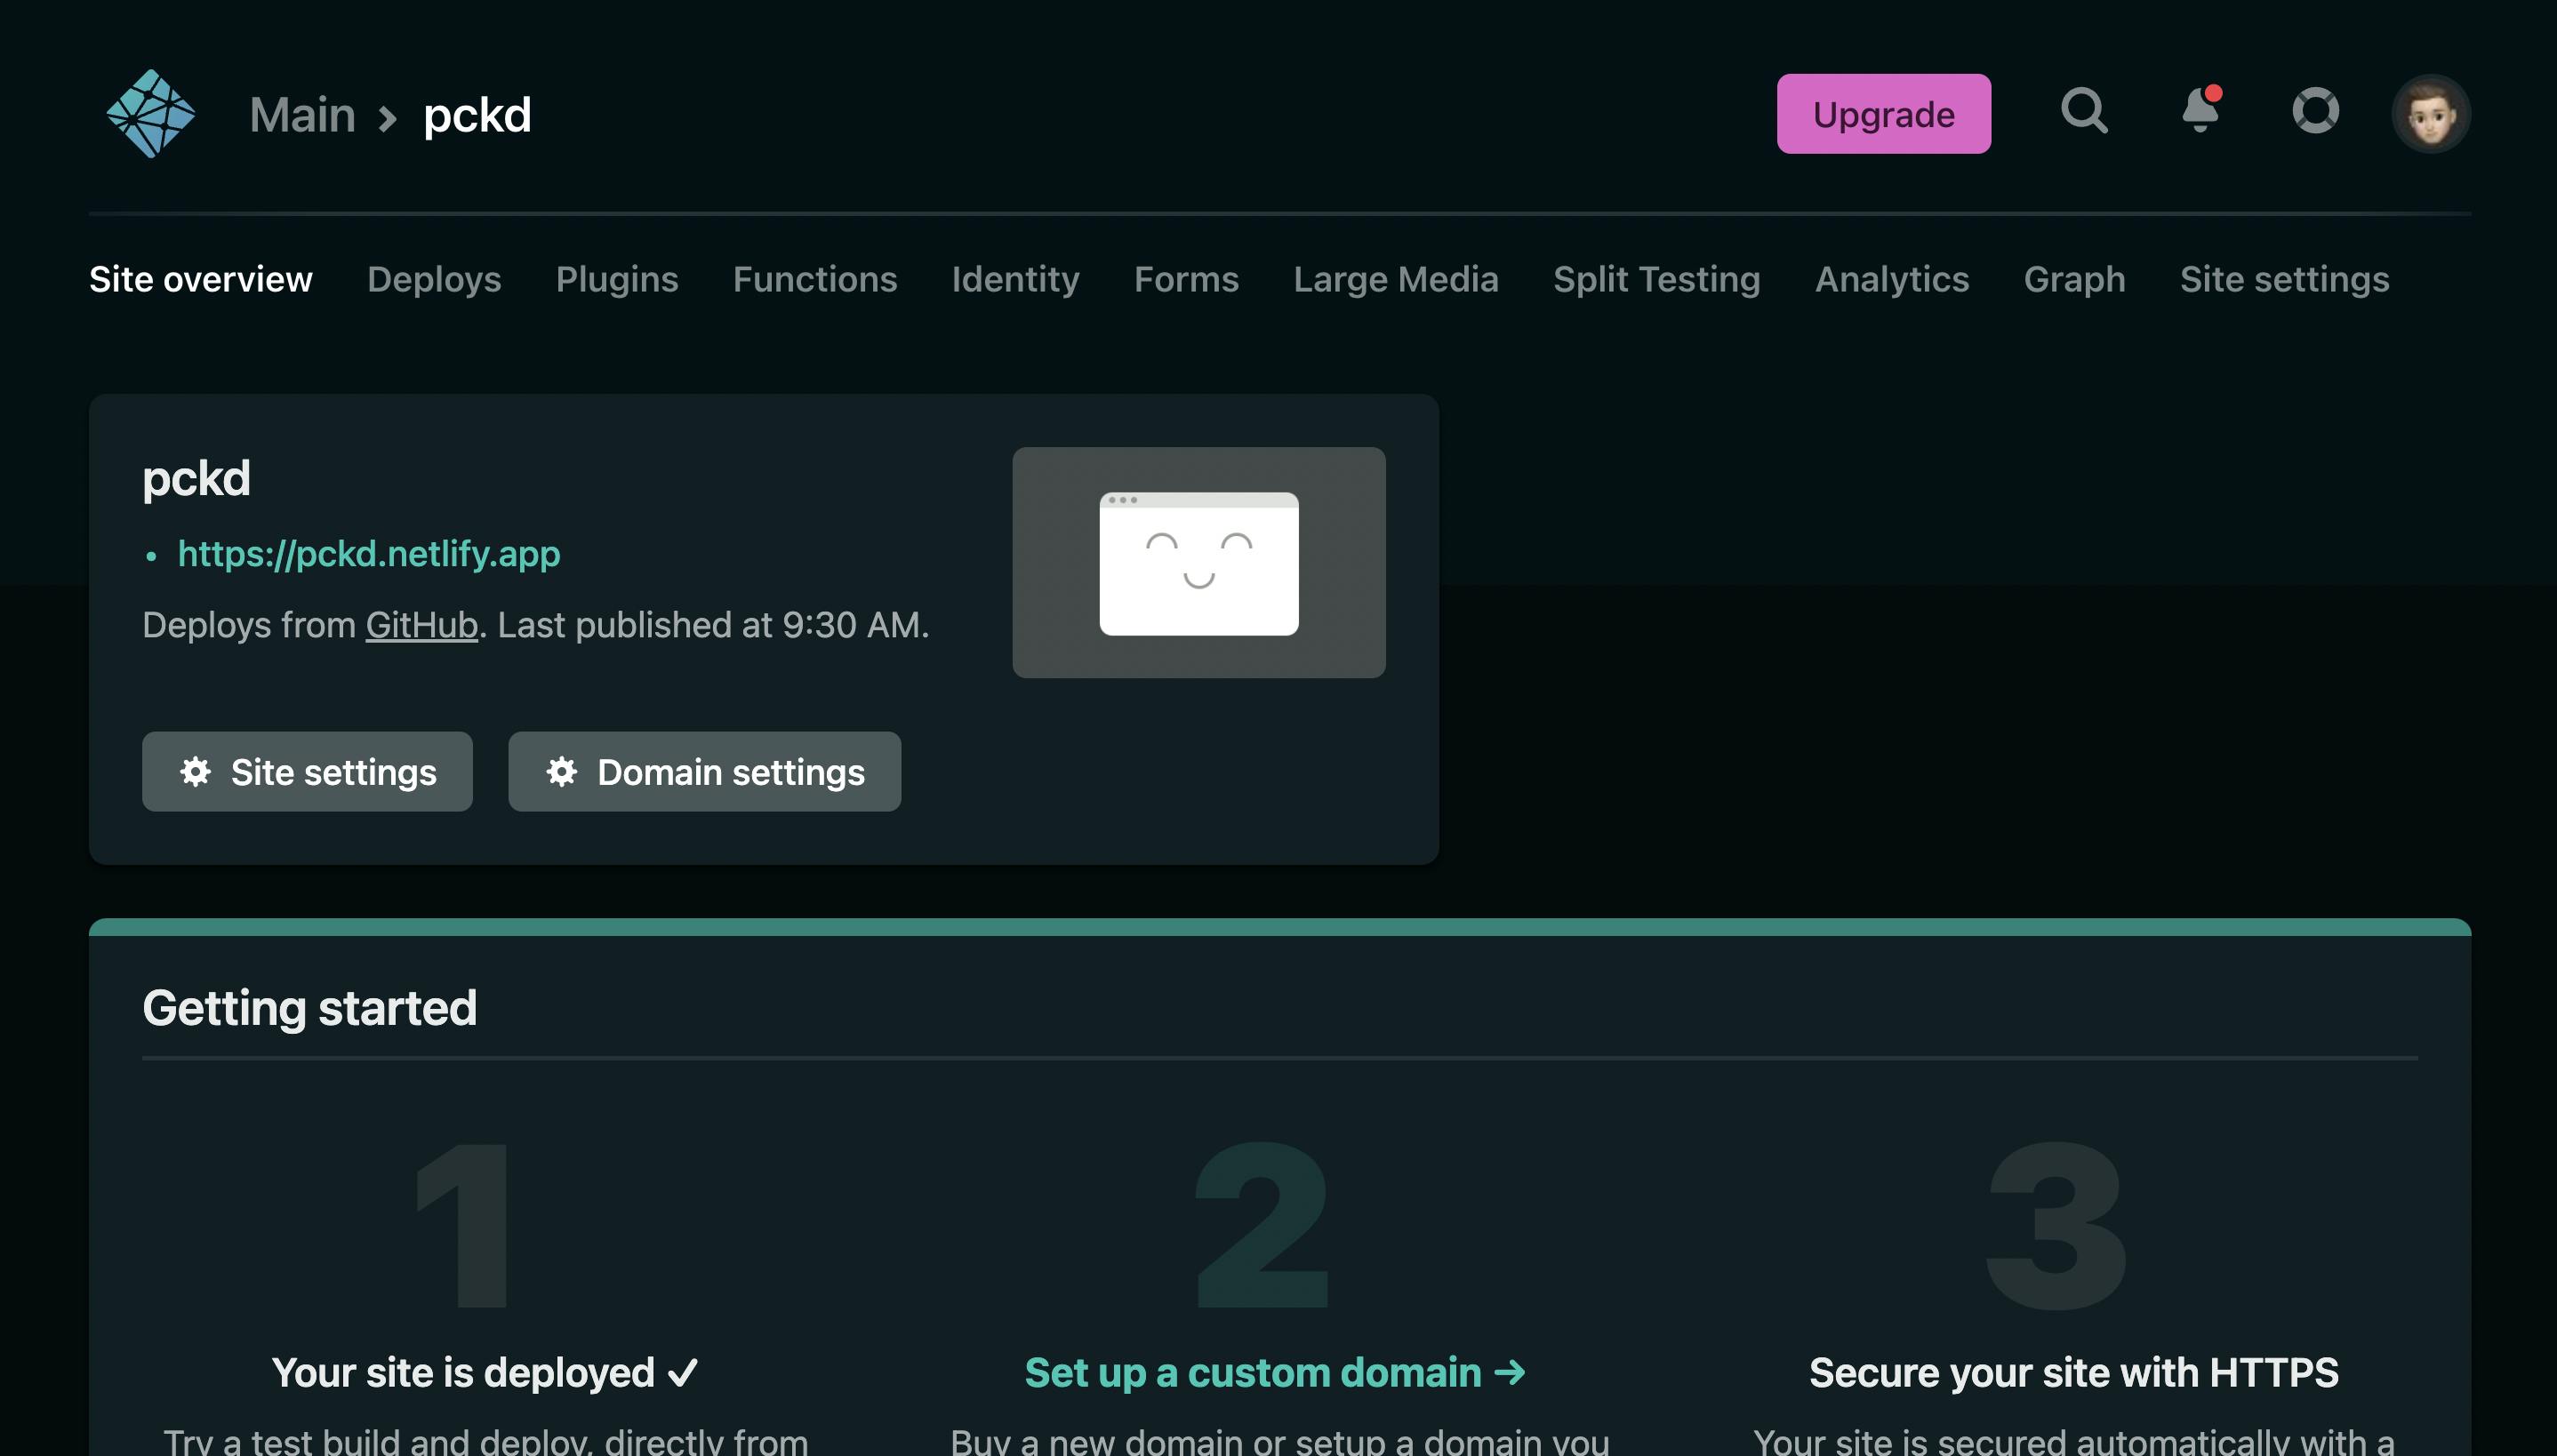
Deploying on Netlify was undoubtedly the easiest part of the project, period!
Try it yourself
Here are some useful links you would need:
- 🚀 Project Demo - pckd.mohityadav.codes/devto-demo
- 🐱 GitHub Repo - github.com/Just-Moh-it/pckd
I hope you liked the blog. If you did, please leave your thoughts in the comments. It would make my day.
Till then, happy 💻 coding! 🍿